Character Design: From Concept to Finished Art
Creating memorable digital characters requires a thoughtful process. Follow along as we break down the complete workflow from initial concept sketches to fully rendered character designs, with insights from professional character artists.

Introduction: The Art of Character Design
Characters are the heart of storytelling across all media—from games and animation to comics and illustration. A well-designed character can become iconic, instantly recognizable, and form a powerful emotional connection with audiences.
But creating compelling characters involves much more than just drawing an attractive figure. It requires thoughtful consideration of personality, function, visual storytelling, and technical execution. In this comprehensive guide, we'll walk through the entire character design process from initial concept to finished digital artwork.
Whether you're designing characters for games, animation, comics, or personal projects, these principles and workflow steps will help you create more meaningful, memorable, and effective character designs.
Phase 1: Concept Development
Understanding Character Purpose
Before drawing a single line, ask yourself these key questions:
- What role does this character play? Protagonist, antagonist, supporting character, etc.
- What medium is the character for? Game, animation, comic, illustration, etc.
- What technical constraints exist? Polygon count limitations, animation requirements, art style compatibility, etc.
- Who is the audience? Age group, demographics, cultural considerations, etc.
The answers to these questions will guide your design decisions throughout the process. For example, a game character might need designs that work from multiple angles, while a comic character might need a distinctive silhouette that's recognizable even in small panels.
Character Backstory and Personality
Even the simplest character designs benefit from having a defined personality and backstory. This doesn't mean writing a novel—even a brief character profile can provide valuable direction for your design:
- Background: Where does the character come from? What experiences shaped them?
- Personality traits: Are they confident or shy? Analytical or impulsive? Kind or cruel?
- Motivations: What drives this character? What do they want?
- Relationships: How do they connect with other characters?
- Flaws and strengths: What makes them interesting and complex?
These character elements should inform visual design choices. For example, a character with a military background might stand with perfect posture, while someone with a carefree personality might have more relaxed, asymmetrical clothing.
Research and Reference Gathering
Every strong character design is built on a foundation of research. Create a reference board including:
- Visual style references: Art styles similar to your project
- Subject matter research: Historical periods, occupations, cultural elements relevant to your character
- Design elements: Clothing details, props, architectural influences, etc.
- Mood and atmosphere: Images that capture the feeling you want your character to evoke
Digital tools like PureRef, Pinterest, or even a folder of saved images can help organize your references. The goal isn't to copy, but to inspire and inform your original creation.

Phase 2: Visual Development
Silhouette and Thumbnail Sketches
The most memorable characters have instantly recognizable silhouettes. Begin with small, simple shape explorations:
- Create 10-20 quick thumbnail sketches focusing only on the overall shape
- Work small (1-2 inches) to force yourself to focus on big shapes rather than details
- Experiment with different proportions, poses, and design elements
- Test silhouettes by filling them with black to check readability
Consider how shape language communicates personality:
- Circular, soft shapes often suggest friendliness, youth, or approachability
- Square, blocky shapes can communicate stability, strength, or stubbornness
- Triangular, sharp shapes might suggest danger, agility, or cunning
- Contrasting shapes can create interesting visual tension (e.g., a character with a bulky upper body and thin legs)
Select 3-5 of your strongest thumbnails to refine further.
Design Iteration and Refinement
Take your selected thumbnails and develop them with more detail:
- Sketch multiple variations of each design, exploring different costume elements, facial features, proportions, etc.
- Consider how your character's personality is expressed through their physical appearance
- Think about color schemes that might complement the character's personality and role
- Gather feedback from peers or mentors to identify the strongest elements of each iteration
At this stage, focus on problem-solving rather than rendering. You're still working out design issues, not creating finished art.
Character Turnaround Planning
For characters that will be viewed from multiple angles (especially for games or animation), plan a character turnaround:
- Create a consistent construction framework (height lines, center line, etc.)
- Sketch the character from front, 3/4, side, and back views
- Ensure design elements make logical sense from all angles
- Consider how accessories, clothing, and features wrap around the form
This planning will save you significant time later, especially if your character will be modeled in 3D or animated.
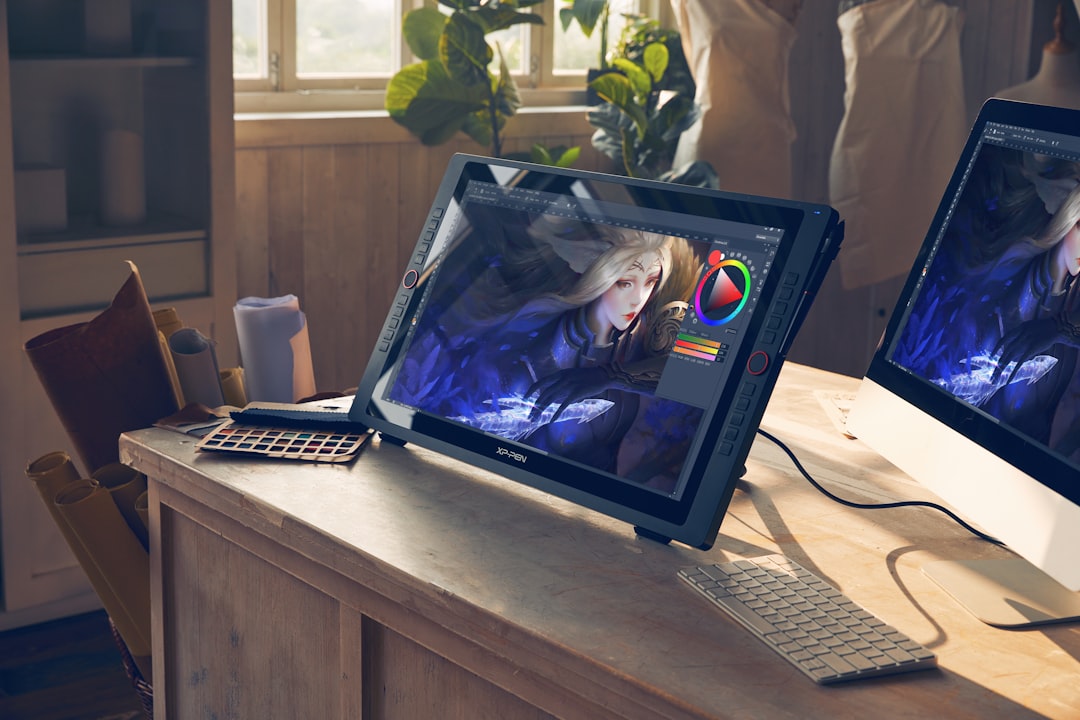
Phase 3: Digital Execution
Setting Up Your Digital Canvas
With your design decisions made, it's time to create your final artwork:
- Create a high-resolution document (at least 3000px on the longest side at 300 DPI for print-quality work)
- Set up a logical layer structure (background, line art, flat colors, shading, effects, etc.)
- Import your refined sketch as a reference layer
- Consider creating a simple color palette as a reference layer
A well-organized file makes the rendering process much more efficient, especially for complex character designs.
Clean Line Art Techniques
If your style includes line art, these techniques can help achieve clean, professional results:
- Pressure sensitivity: Adjust your pen settings to create line weight variation that enhances form
- Line confidence: Use quick, deliberate strokes rather than hesitant, sketchy lines
- Line weight hierarchy: Use thicker lines for the character's outer contour and primary forms, thinner lines for details and textures
- Tapering: Gradually thin lines at their endpoints for a more polished look
- Vector tools: Consider programs like Adobe Illustrator for ultra-clean line work, especially for cartoon styles
If your style is more painterly without defined line art, you can skip this step and move directly to establishing your color and value structure.
Color and Value Fundamentals
A strong value structure is crucial for readable character designs:
- Begin with flat colors to establish your base color scheme
- Check your design in grayscale to ensure good value separation between elements
- Create a clear hierarchy with focal points (usually the face) having the highest contrast
- Consider color harmony principles (complementary, analogous, triadic, etc.) for a cohesive look
- Use color to reinforce character personality and role (vibrant colors for energetic characters, muted tones for serious ones, etc.)
Remember that color can be used symbolically as well as aesthetically. For example, a character with internal conflict might have a design that incorporates opposing colors.
Rendering and Detailing
With your foundation established, add dimension and detail:
- Establish a clear light source direction and stick to it consistently
- Add basic shading to define the forms of your character
- Consider the material properties of different elements (metal reflects light differently than fabric)
- Add texture details appropriate to your style (subtle for realistic work, more pronounced for stylized designs)
- Work from large forms to small details, maintaining a clear hierarchy
- Use rim lighting or edge highlights to help separate your character from the background
When adding details, always ask if they support the character's story and personality. Details should enhance the design, not distract from it.
Phase 4: Finishing Touches
Background and Presentation
How you present your character design can significantly impact its reception:
- Create a simple background that complements your character without overwhelming them
- Consider including key poses or expressions to show personality and range
- For portfolio pieces, include process work to demonstrate your design thinking
- Add a subtle signature or watermark for work you share online
The presentation should enhance the character design and reflect its intended use and audience.
Final Review and Iteration
Before finalizing your design:
- Step away from your work briefly to return with fresh eyes
- Check your design at different sizes to ensure it reads well at various scales
- Flip your canvas horizontally to catch proportional issues
- Seek feedback from trusted peers or mentors
- Ensure your design fulfills its original purpose and communicates the intended personality
Don't be afraid to make adjustments even at this late stage—professional character designers know that iteration is key to excellence.
Preparing Files for Different Uses
Depending on your character's intended use, prepare appropriate file formats:
- Portfolio display: High-quality JPG or PNG files at web-friendly resolutions
- Print: CMYK files at 300 DPI in PSD, TIFF, or PDF formats
- Game or animation production: Separated layers, possibly with transparency, in formats specified by the production pipeline
- Commercial use: Both web and print-ready versions, possibly with color variants
Always retain your layered master file for future edits or repurposing.
Professional Insights: Tips from Industry Character Designers
Design for Recognition
"A truly successful character should be recognizable even as a tiny thumbnail or in silhouette. Think about what makes your character instantly identifiable—it might be a unique hairstyle, distinctive costume element, or unusual body shape." — Claire Thompson, Animation Character Designer
Design for Story
"Every visual element should tell part of the character's story. That scar, that worn-out jacket, that unique posture—they should all communicate something about who this character is and what they've experienced." — Miguel Ortiz, Game Character Artist
Design for Production
"Always consider the practical implementation of your design. A character with dozens of floating accessories might look cool in a static image but could be a nightmare to animate or model in 3D. Know the constraints of your medium." — Leila Nakamura, Comic Artist and Illustrator
Design for Contrast
"Create visual interest through contrast—not just in colors, but in shapes, textures, and proportions. A character with a bulky upper body and thin legs, or flowing hair but angular facial features, becomes more visually memorable." — Devon Wright, Concept Artist
Common Character Design Pitfalls
Overdesigning
Adding too many details, accessories, or complex elements can overwhelm your character design. Remember that restraint often results in more iconic, memorable characters. Ask yourself if each element serves a purpose in communicating character personality or function.
Generic Design
The opposite problem is creating a character that lacks distinctive features. Avoid relying on standard tropes without adding unique elements. Look for opportunities to subvert expectations or add unexpected details that make your character stand out.
Inconsistent Style
Mixing realistic rendering with cartoon proportions or combining incompatible design languages can create a disjointed character. Maintain consistency in your stylization level, detail approach, and overall aesthetic.
Poor Anatomy Understanding
Even stylized characters need to be built on a foundation of anatomical understanding. Study real anatomy before you decide how to distort or stylize it. This knowledge helps you make intentional stylistic choices rather than anatomical mistakes.
Conclusion: Beyond the Design
Character design is both an art and a craft—it requires creative vision and technical skill, but also thoughtful consideration of story, function, and audience. The most successful character designs go beyond looking good; they communicate personality, support narrative, and connect emotionally with viewers.
Remember that character design is an iterative process. Don't expect perfection on your first attempt. Each design you create builds your skills and visual vocabulary for future projects.
Whether you're designing characters for professional projects or personal expression, the principles in this guide will help you create more thoughtful, effective, and memorable character designs. Your characters are waiting to be brought to life—all they need is your unique creative vision and the dedicated craft to execute it.